
Fermentation isn’t just a trend — it’s a conversation with the past. At Old School Ferments, we keep alive the old art of letting time and nature turn simple ingredients into something extraordinary.
Whether you’re after better gut health, longer-lasting produce, or simply incredible flavor, learning to ferment food at home will change the way you look at nourishment.
In this guide, you’ll learn exactly how to start fermenting safely, what you’ll need, and how to avoid beginner mistakes — from your first batch of sauerkraut to your finest work of bubbly kombucha.
What Is Fermentation?

Fermentation is nature’s way of preserving and enhancing food — when beneficial microorganisms like lactic acid bacteria and yeasts convert natural sugars into acids and gases.
In simpler terms:
You give microbes the right environment (salt, temperature, and time), and they transform your vegetables or drinks into something tangy, probiotic-rich, and packed with flavor.
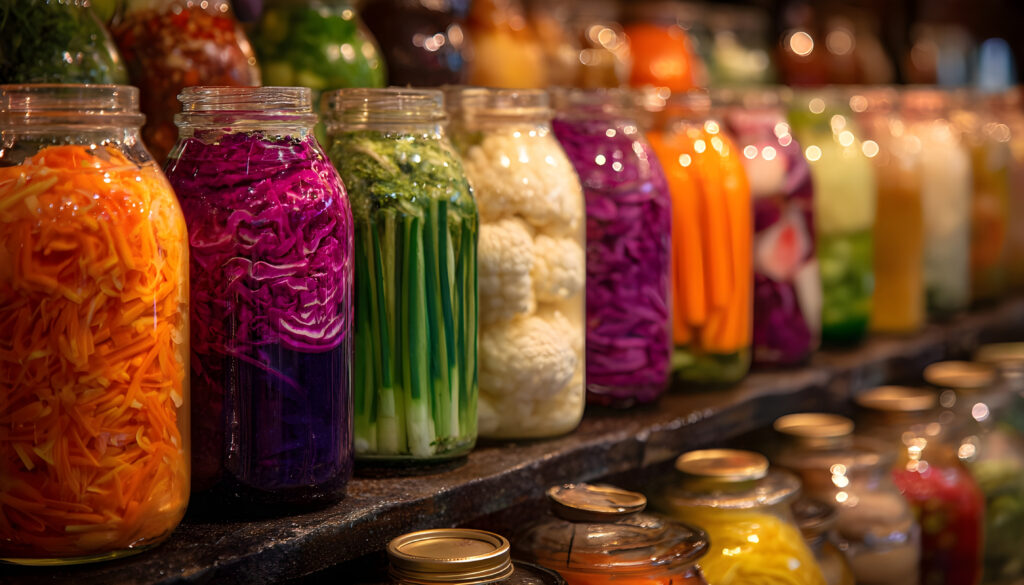
This process has been used for thousands of years across every culture: Koreans ferment kimchi, Europeans ferment sauerkraut, and Central Americans ferment hot sauces and salsas. The science is simple, but the results are complex and deeply satisfying.
Why You Should Start Fermenting Food at Home
Fermented vegetables, drinks, and condiments are alive with beneficial bacteria that help your digestion, balance your gut, and even lift your mood.
Learn more from Harvard Health Publishing’s “The benefits of fermented foods”, which explains how naturally fermented foods support a healthy microbiome.
These aren’t sterile capsules from a store — they’re living cultures that grow right on your countertop, working in harmony with the enzymes and nutrients already in your body.
Fermentation Preserves Food Without Chemicals
Long before refrigerators and preservatives, our ancestors turned fresh harvests into lasting nourishment. A handful of salt and a little patience kept vegetables crisp, safe, and delicious through the cold months.
When you ferment, you’re stepping into that same rhythm — capturing the abundance of summer and carrying it into winter, with nothing added but time.
Fermentation Creates Deep, Living Flavor
Fermentation doesn’t just preserve food — it transforms it. Crunchy cabbage becomes tangy sauerkraut, milk turns to creamy yogurt, peppers mellow into smoky heat. Every jar is its own small experiment, each batch tasting a little more alive than the last.
You can taste the patience, the air, and even the season in every bite.
No two of my ferments ever taste the same. Even when I’ve followed the same recipe. That’s the fun part: the microbes have opinions.
A Simple, Sustainable Tradition
Fermenting is the old-world answer to food waste. The vegetables that might wilt in the fridge become probiotic powerhouses that last for months. It’s simple, it’s frugal, and it feels good — turning what might have gone to compost into something nourishing, bright, and full of life.
Fermentation Time by Food Type
You can ferment almost anything — from vegetables to grains to tea. Here’s a quick guide to inspire your next batch.
| Category | Examples | Typical Ferment Time |
|---|---|---|
| Vegetables | Sauerkraut, kimchi, pickles, carrots, garlic, beets, cauliflower, radishes, green beans | 5–21 days |
| Beverages | Kombucha, ginger beer, water kefir, milk kefir, tepache, kvass | 2–14 days |
| Condiments & Sauces | Hot sauce, salsa, ketchup, mustard, relish, chili paste, soy sauce | 3–30 days |
| Dairy | Yogurt, cheese, sour cream, buttermilk, crème fraîche | 6–48 hours |
| Grains & Legumes | Sourdough starter, idli/dosa batter, fermented oatmeal, natto, tempeh | 1–7 days |
| Fruits | Fermented apples, berries, plums, pineapple (tepache), fruit chutneys | 2–10 days |
| Meat & Fish (advanced) | Salami, pepperoni, fermented fish sauce, kimchi-style seafood | 5–30 days+ |
| Vinegars & Wines | Cider vinegar, wine, mead, fruit vinegars | 14–60 days+ |
| Traditional Oddities | Miso, soy sauce, black garlic, koji rice, fermented honey | Weeks to months |
Fermentation times vary with temperature, salt level, and personal taste. The beauty of it all? There’s no single “right” flavor — only the point where you decide it’s perfect.
Equipment and Tools You’ll Need

Starting out doesn’t require fancy gear — but the right setup will make your life easier and your results more consistent.
The Essentials
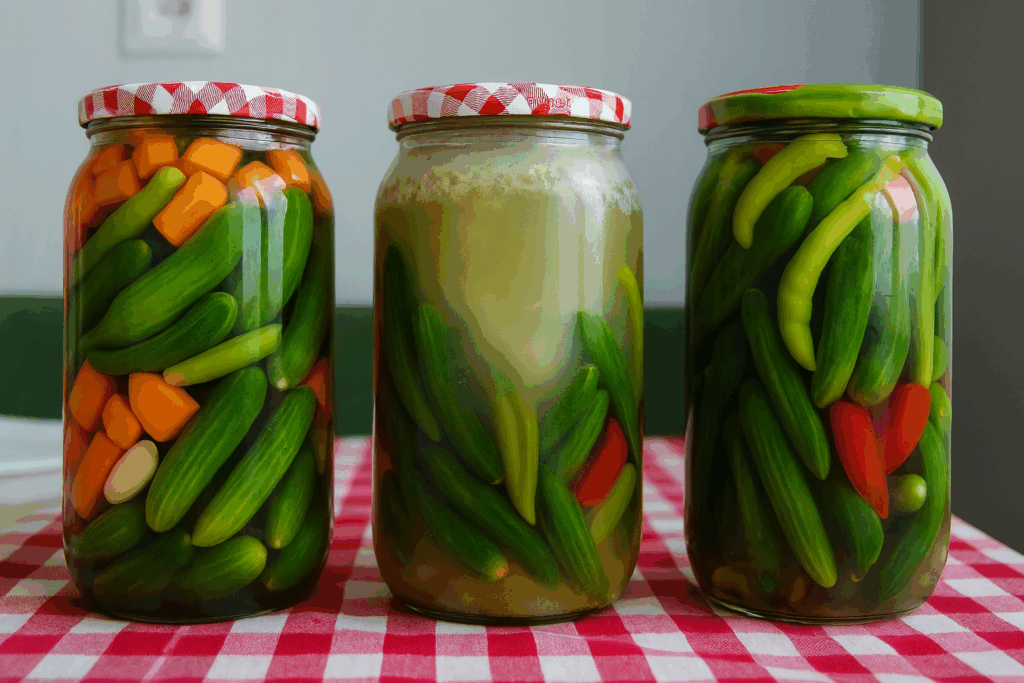
- Glass Jars: Mason jars work great. Quart-sized jars are ideal for small batches. I started with old mason jars I used for sweet tea. I still catch the occasional whiff of funky garlic. Totally worth it.
- Weights: Keep vegetables submerged to prevent mold. You can buy glass weights or improvise with a smaller jar.
- Lids or Airlocks: Use loose-fitting lids or special fermentation caps that let CO₂ escape while keeping oxygen out.
- Salt: Use non-iodized salt (like sea salt or pickling salt). Iodine can slow fermentation.
- Clean Workspace: Sanitize your jars, but don’t over-sterilize. Fermentation thrives on natural bacteria — just keep things tidy.
Optional Tools (For Serious Fermenters)
- Fermentation Crock: Perfect for large batches.
- Thermometer or Temperature Strip: Helps monitor ferment speed.
- Funnel and Tamper: Makes packing jars easier and cleaner.
The Basic Fermentation Process (Step-by-Step)

Here’s the foundation that applies to almost any ferment:
Step 1: Choose Your Ingredients
Start with the freshest produce you can find — ideally local and organic. Those invisible microbes clinging to garden vegetables are your best helpers. The fresher the food, the livelier the ferment.
Step 2: Create Your Brine or Salt Mix
- For brined ferments (like pickles or carrots), dissolve 2–3% salt by weight in clean water — roughly 2–3 grams per 100 grams of water.
- For dry-salted ferments (like sauerkraut or kimchi), sprinkle salt directly over chopped vegetables and massage until they release enough liquid to cover themselves in their own natural brine.
Step 3: Submerge Completely
Fermentation happens below the surface. Oxygen invites mold, so press your ingredients down and keep them completely under the brine line. Use a glass weight or improvise with a clean leaf of cabbage folded over the top. If you hear a jar fizz or hiss, don’t panic — that’s the sound of life doing its job. It still makes me smile every time.
Step 4: Seal and Store
Loosely cover or use an airlock lid. Place the jar somewhere dark and stable at 65–75°F (18–24°C).
Step 5: Monitor and Taste
This is where the magic begins: invisible life turning sugars into tang and fizz. Once the taste is correct, put it in the fridge, where the fermentation will slow down drastiacally.

Common Beginner Mistakes (and How to Avoid Them)
Fermentation is simple, but it rewards patience and respect for nature’s rhythm. Most mishaps come from a few easy-to-fix habits — here’s how to keep every batch thriving.
Not Enough Salt
Salt isn’t just seasoning — it’s protection. Too little, and spoilage organisms take over before the good microbes can do their work. Stick to 2–3% salt by weight for vegetables unless a recipe says otherwise.
Letting Vegetables Float
Anything above the brine line is exposed to oxygen, and oxygen invites mold. Always press or weigh down your ingredients so everything stays submerged and safe.
Too Much Heat
Fermentation thrives in steady, cool warmth — not summer sun. Above 80°F (27°C), textures soften and batches can spoil.
Overtightening the Lid
Your jar is alive — it needs to breathe. If you seal it tight, gas has nowhere to go. Use an airlock lid or burp your jars daily during the first few days.
Impatience
The hardest part is waiting. Each day of fermentation builds more depth, flavor, and health benefits.
Let time and nature do the work — your only job is to taste, trust, and wait.
Safety and Troubleshooting
One of the biggest fears for new fermenters is safety — and that’s completely understandable. The good news? Proper fermentation is incredibly safe once you know what to look for.
Recognizing Normal Fermentation Signs
- Bubbles: These show CO₂ is being released — it’s a great sign.
- Cloudy Brine: Perfectly normal; it means bacteria are active.
- Tangy Aroma: Should smell pleasantly sour or earthy, never rotten.
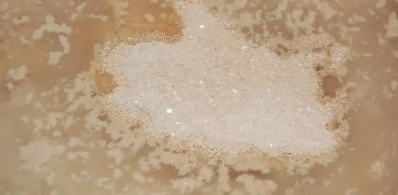
- White Film (Kahm Yeast): Harmless — skim it off if it forms.
When to Discard
Even the best fermenters lose a batch now and then. If you notice any of the following, it’s time to compost it and start fresh — no shame in it, just another lesson from nature.
Signs It’s Gone Bad
- Fuzzy mold (white, green, blue, or black)
- Pink or orange discoloration
- A rotten, rancid, or chemical odor
Don’t confuse mold with harmless surface films like Kahm yeast — a thin, flat, white layer that can form on top of brine and is perfectly safe to skim off.
When in doubt, toss it.
A jar of food isn’t worth your health — and every spoiled batch teaches you something for the next one.
The Role of Temperature and Time
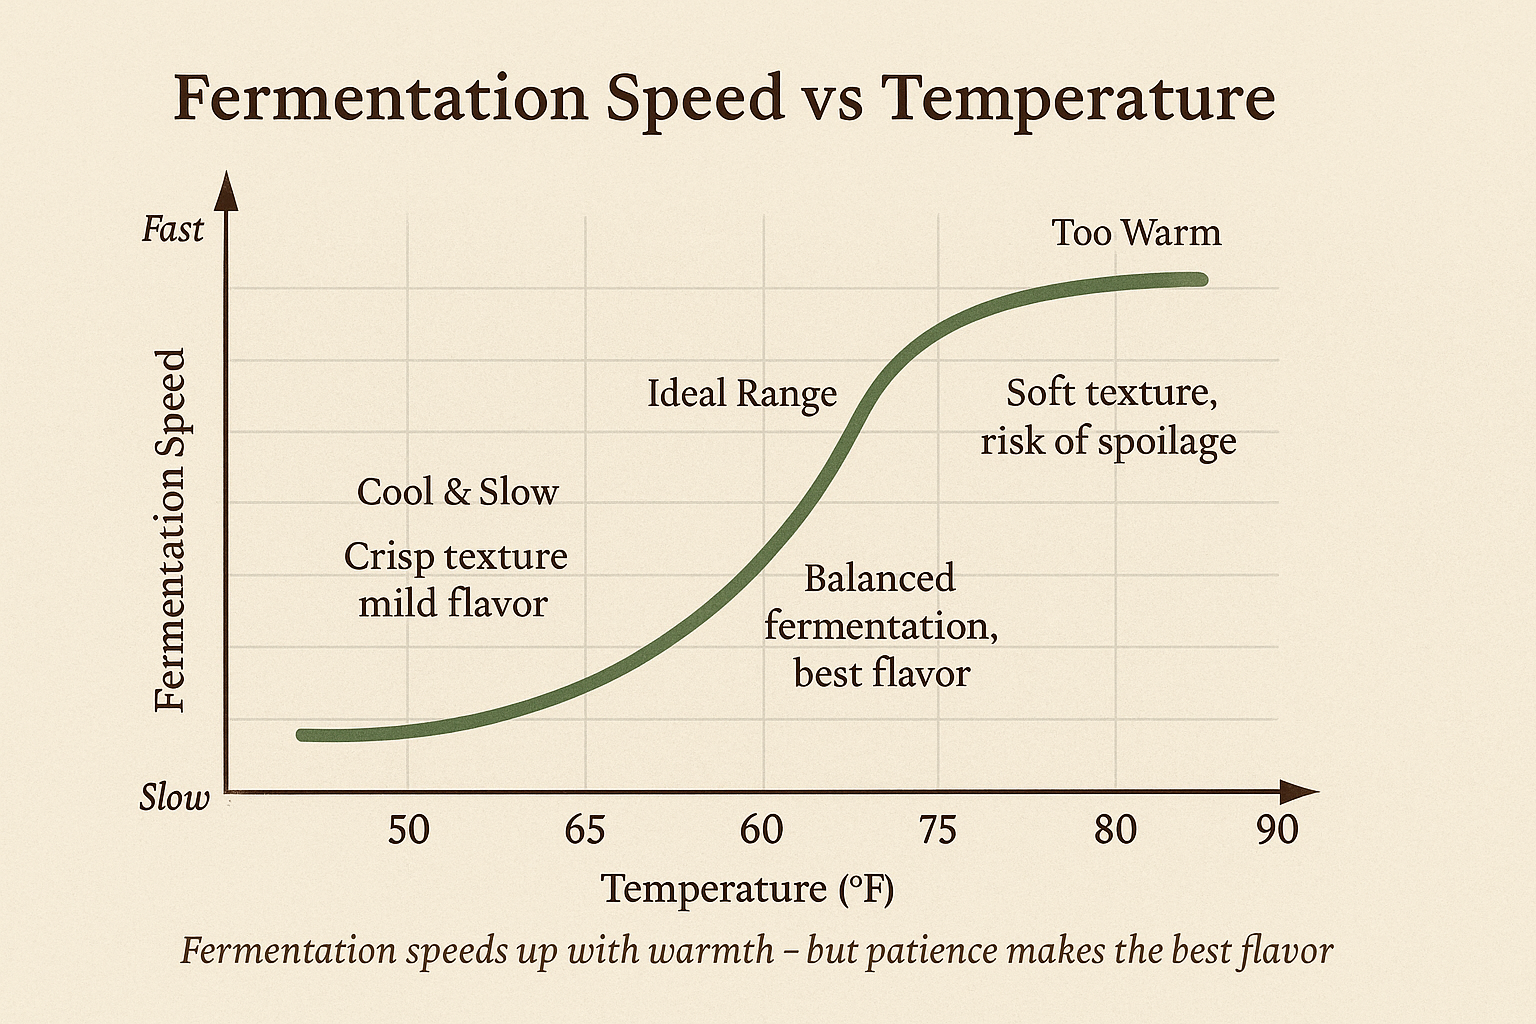
Fermentation is a living process, and temperature is one of its main drivers. The warmer it is, the faster the microbes work — but go too hot and texture suffers.
| Temperature | Speed | Flavor Result |
|---|---|---|
| 60–65°F (15–18°C) | Slow | Complex, tangy flavor |
| 70–75°F (21–24°C) | Ideal | Balanced taste and texture |
| 80°F+ (27°C+) | Too fast | Risk of mushiness or off-flavors |
Try to keep your ferments in that sweet spot, around 70°F for the best results. A pantry, cupboard, or basement often provides the perfect environment. Just keep them out of direct sunlight — especially if you live in the South, like I do. The summer heat can speed things up faster than you’d like.
How to Store Fermented Foods
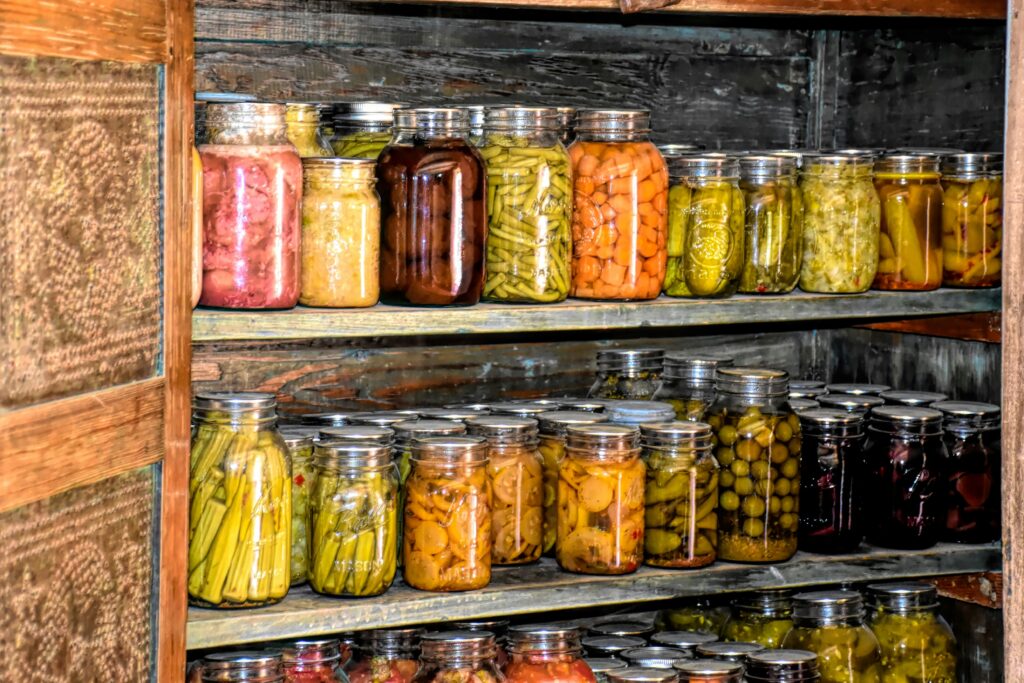
Once your ferment tastes right, it’s time to slow the microbes down. Move the jar to the fridge, cellar, or another cool space.
Cold storage doesn’t stop fermentation — it just slows it dramatically, preserving flavor and texture for months. Most ferments last 6 months or longer when refrigerated, though the flavor will continue to evolve subtly over time. Sometimes I’ll open an old jar from the back of the fridge, months later, and it tastes even better than I remember.
Sometimes I’ll open an old jar from the back of the fridge, months later, and the brine gives off that soft fizz and tang — proof that it’s still alive and well.
Tip: Label your jars with the date you started and the date you moved them to the fridge. You’ll thank yourself later.
Safety FAQ — Common Questions for Beginners
Note: I’m not a medical professional — just a longtime fermenter sharing what’s worked for me. Always trust your senses and use clean ingredients.
❓ Is it safe to ferment food at home?
Yes — fermentation is one of the safest preservation methods when done correctly. The combination of salt and acid prevents harmful bacteria from surviving. Still, it’s important to follow basic food-safety practices. Learn more in the USDA’s “Safely Fermenting Food at Home” guide (PDF).
❓ Can fermentation make you sick?
Very unlikely. Pathogenic bacteria can’t thrive in acidic, oxygen-free environments. If it looks or smells rotten, trust your senses and discard.
❓ How do I know when my ferment is done?
Taste is your best guide. Once it’s tangy and sour to your liking, it’s ready. There’s no “wrong” finish line.
❓ Can I use table salt or tap water?
Use non-iodized salt and dechlorinated water. Iodine and chlorine can slow or inhibit fermentation.
❓ What should I do if I see bubbles or white film?
Celebrate — that means your microbes are doing their job. The white film is likely Kahm yeast; just skim it off.
Advanced Tips Once You’re Comfortable
Experiment with Flavor
Once you’ve got a few jars under your belt, start playing with personality. A clove of garlic, a thumb of ginger, a few dill sprigs, mustard seeds, or chili flakes — small touches make a big difference. Keep it simple at first; one or two additions per batch let you taste how each ingredient shapes the ferment.
Track Your Batches
Every batch tells a story. Note your salt ratio, room temperature, and the day it hit that perfect flavor. Over time, you’ll start to recognize patterns — the rhythm of your own kitchen — and that’s how fermentation intuition begins to grow.
Reuse Your Brine
That leftover brine isn’t waste — it’s experience in liquid form. It’s alive with the same microbes that made your last batch great. Pour a little into your next ferment to give it a head start, passing along the culture like an old family secret.
Join the Fermentation Revival

At Old School Ferments, we believe learning to ferment isn’t just about food — it’s about remembering how to live with time, tradition, and patience again.
Fermenting food at home is simple once you get started. You’ll build confidence with every batch and soon wonder how you ever cooked without it.
Final Thoughts
Fermentation turns everyday ingredients into living foods that nurture your body and connect you to centuries of culinary wisdom. Whether you’re preparing sauerkraut for gut health, kombucha for fizz, or hot sauce for flavor, remember — you’re part of an ancient, living craft.
So grab a jar, a bit of salt, and start your first ferment today.
Once you’ve set the stage, the microbes handle the rest.
FAQ
What is fermenting food at home?
Fermenting food at home means using beneficial microbes like lactic acid bacteria or yeast to naturally preserve and enhance food without chemicals or refrigeration.
How long does fermentation take?
Most vegetable ferments take 5–14 days at room temperature. Warmer environments speed up the process; cooler ones slow it down.
What are the health benefits of fermented foods?
They’re rich in probiotics that support gut health, digestion, immunity, and overall well-being.
Do I need special equipment to start fermenting?
No — basic jars, salt, and clean produce are enough. Specialized lids and weights help but aren’t required.